Showing posts with label Guides. Show all posts

Sunday, July 10, 2011

Mac: Bootcamp (Pictures for parts 1 & 2)

Introduction:
My previous bootcamp guide was nowhere near close to finish.
This will be half picture guide to detailed.
I will have photos that show you every step until the windows installation part.
I cannot screenshot once I get to the Windows installation guide so.... yup.
From there I'll have detailed explanations of what to do and what you'll be looking for.
If you cannot read any writing, feel free to request additional help.
To view a picture to its full size, press the command button then click on the picture.
It will in a new tab open up the picture.

Any questions, feel free to e-mail me at fluffehbunnehs@gmail.com
However, I am not liable or will be responsible for the damage of any computers or laptops.
This post is meant to be used as a guide to help Mac users set up Windows on a Mac computer.
If you damage your Mac, or anybody else's that you are trying to set up for them, I hold no responsibility to any damages caused by attempting to set up bootcamp.
(So please.. don't sue me... seriously.)
If you don't like this guide, there is always an "x" button to close out this blog on the left or right corner of your web browser that is always conveniently there for you.

I hope this guide helps someone, good luck!

Bootcamp
What it is: A free program that comes with ever mac computer or laptop that allows you to have windows on your computer and/or laptop. It is by far the best program for mac if you want to use window programs or games. Unlike other programs such as Parallel, Crossover, or the many others, it actually separates your computer/laptop into two complete different systems. Parallel, Crossover, and others are more like applications, thus, they can shut down, freeze, lag, etc.
I personally use bootcamp for games like PWI really.

Things you will need on hand:
A mac computer or laptop (duh)
Lots, and lots of time (about 3-7 hours)
Windows CD
Either a plain CD/disc or your Snow Leopard installation disc that came with your Mac
Space on your computer or laptop
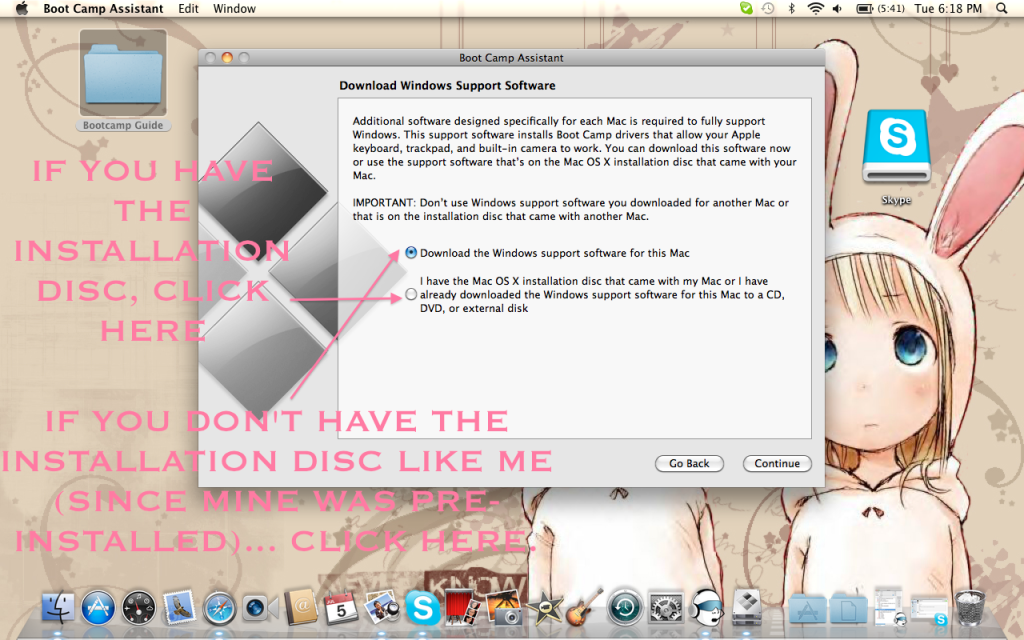
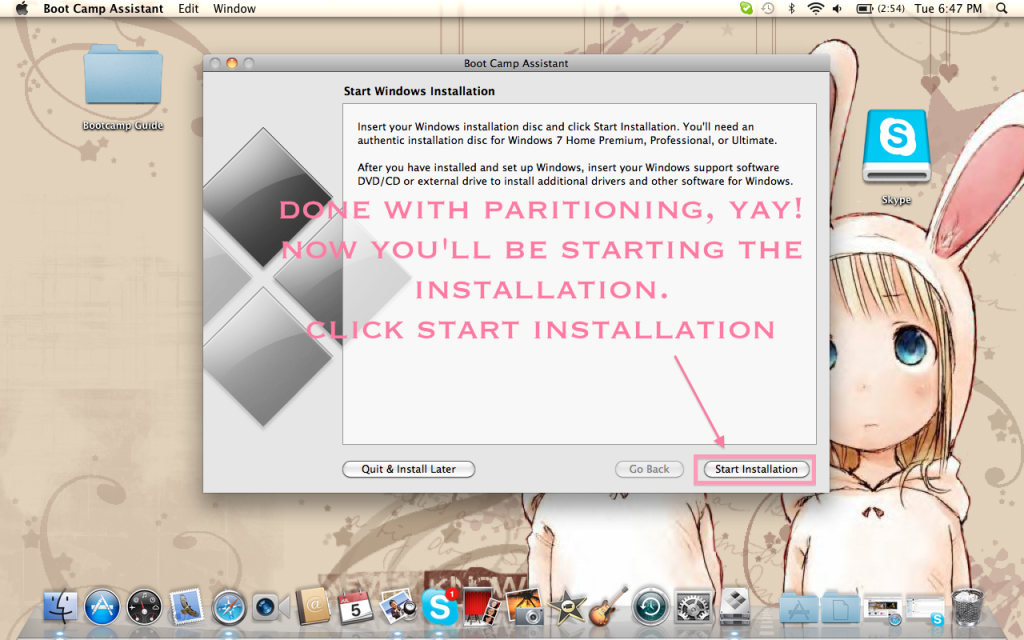
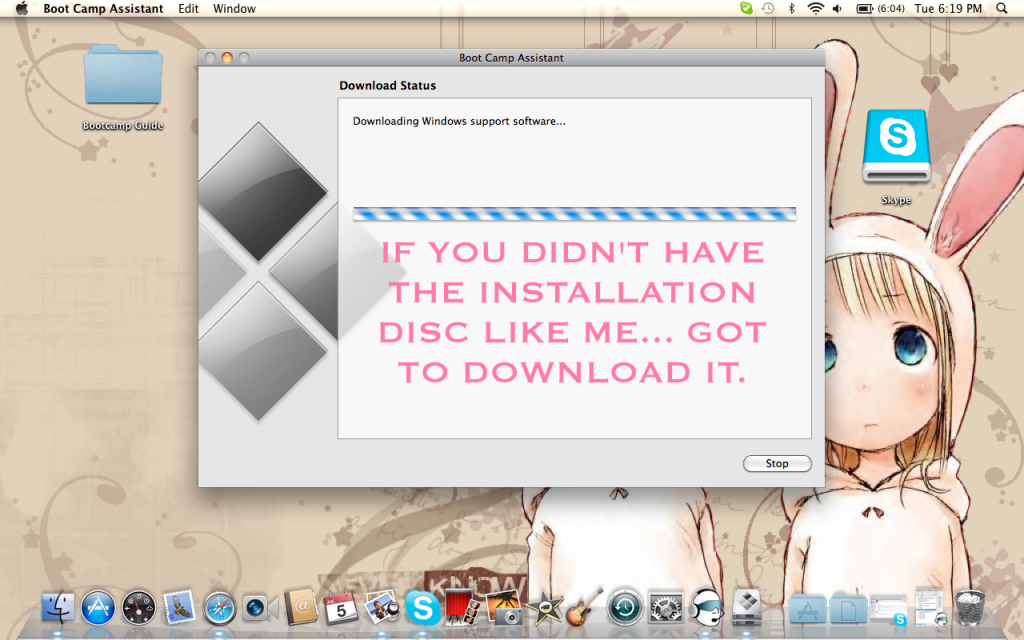
By the way... I think this part right here if you did NOT have an installation disc like me is where you will need your blank CD/disc.
Kind of forgot... oops.
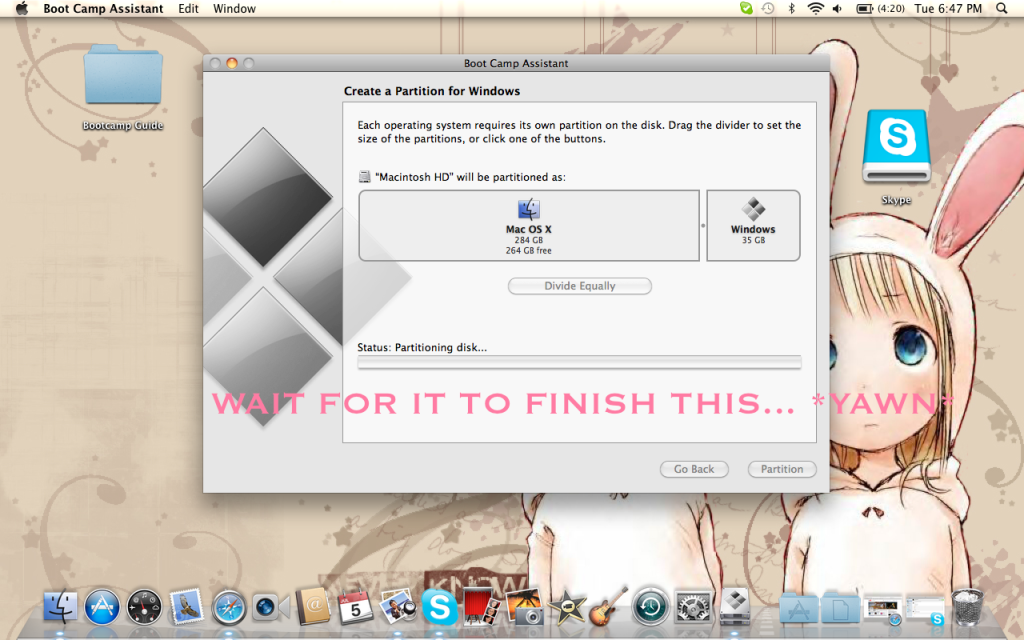
Correction on the screenshot, 20GB is not the lowest you can go. 
5GB is the lowest if I remember correct.
But 20GB should be by far the lowest you should go or you will have no space what so ever.
I definitely recommend at least 30GB if possible.
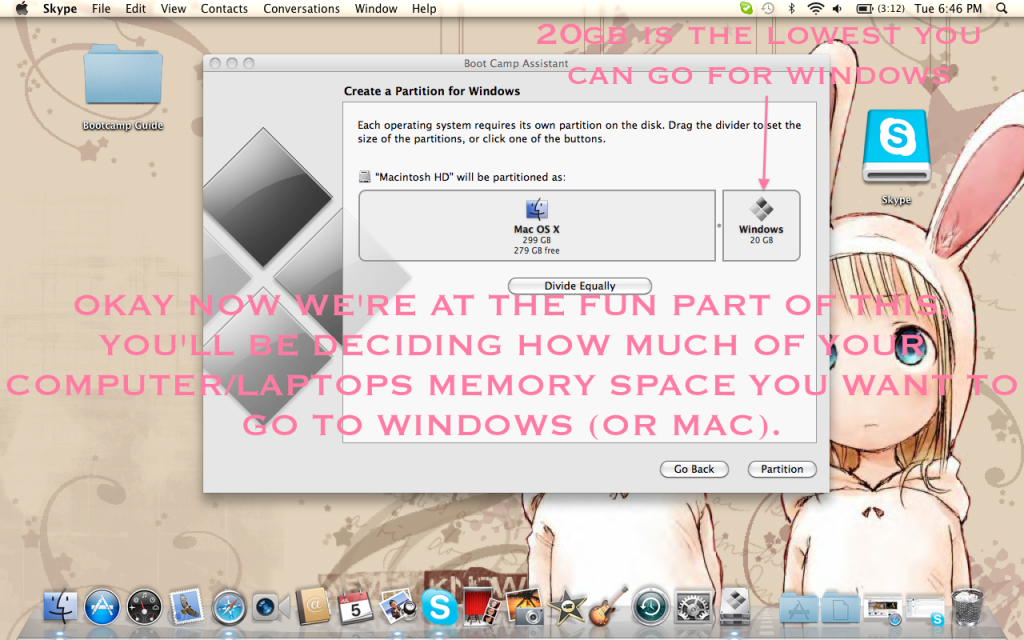
35GB for me since... I use more mac than I'll ever use windows.

From this point on, no screenshots, sorry!
The windows installation part is where a lot of issues happen for people.
I personally have never had issues.... but if you do, there are plenty of guides online that explain you through that.
I'll just skip along for those like me who never had issues.

What you'll do from this point now is put your Windows installation disc into your Mac.
It will automatically reboot itself into installing windows now.

Read the terms and licenses, or skip it like I do....
However, once you get to the part where it asks actually WHERE to install it,
(The question should ask "Where do you want to install Windows?")
CLICK ON THE OPTION THAT READS 
"Disk 0 Partition 3: BOOTCAMP
OR YOU ARE SCREWED, REALLY, SCREWED.
If you screw this part up, you will literally wipe out Mac from your Mac... making it technically.. not a Mac anymore.. and well, unlucky person, screwed for life.
It may ask you if you want to continue on, saying it might wipe out any files or something.
Just keep on going, since nothing should be in the bootcamp partition in the first place.

From there you'll go through the typical procedures of installing windows, setting up your username, password, internet, product key, (I'm not sure what the order is, writing this from memory), etc.
Once you completely finish setting up windows and you get to the main screen, just put in the Snow Leopard installation disc, run Bootcamp, and it should install all the things you need for your Mac to actually use Windows.
(I'll edit here later once I remember the word... haha)

From there, you're done!

To switch from Mac to Windows, when you turn on your Mac laptop or computer, press the alt/option key right away before you see the grey/white screen.
You'll be able to choose if you want to start up with OS X or Windows.
Otherwise, it automatically starts up with OS X.

I hope this helped people!
Any questions or comments, or if you see any errors, comment or e-mail.
(E-mail is more preferable however)
E-mail: fluffehbunnehs@gmail.com

Hope you have a great day!
-smiles-
Bunneh 

Wednesday, June 29, 2011

Guide to how Bunneh edits photos! (Photobucket, iPhoto, PhotoWonder)

I've had a few people ask me how I edit my pictures.
Let me just state that by editing my photos, I do not mean to look like a different race or am trying to pretend to be of another race.
Seriously.
(>*_*<)

Anyways!
Since that's cleared up, here is how I edit my photos!

On the Computer:
What Bunneh mainly uses: Photobucket, iPhoto
Why: Lazy, easy to use, right there

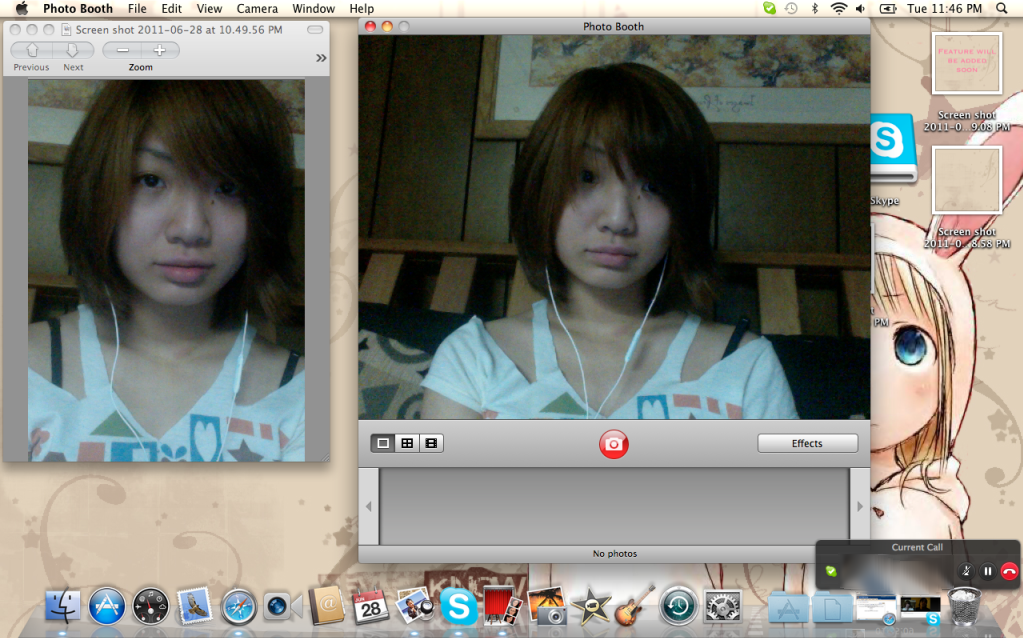
I open up Photo Booth and all I really do is just take lots and lots of screenshots 
(Command + Shift + 3 for Macs)
Taking screenshots as you can see :)
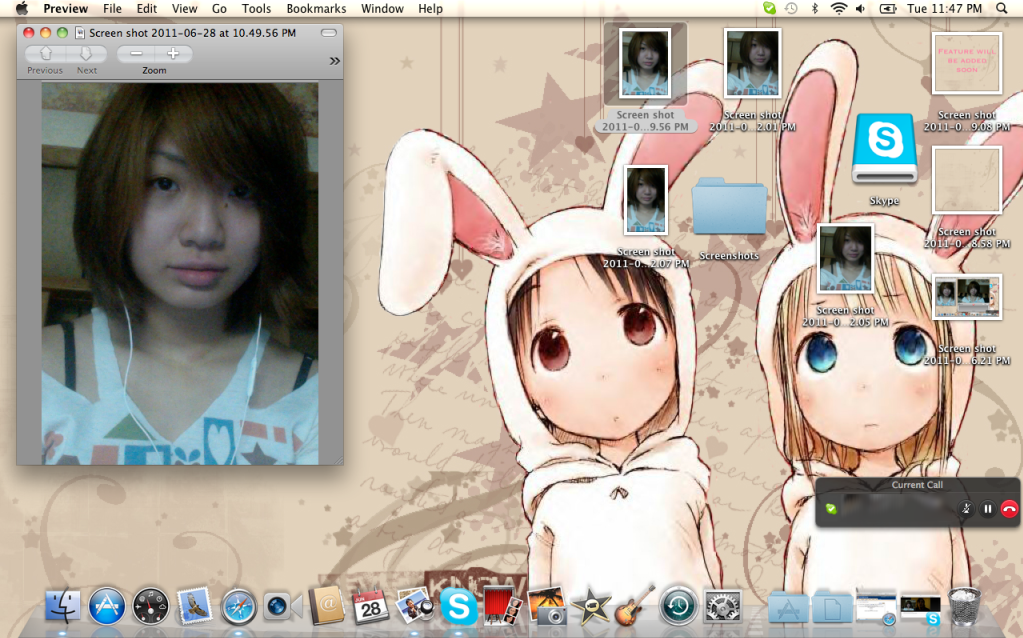
Once I take a good amount of screenshots, I go through all the screenshots, discarding the ones I don't want into the Trash and keep the ones I want.
Once I go through them all, I crop and save the screenshots I want.
(Crop = Command + K while Save = Command + S)
Yes.. you're not hallucinating, I have a Screenshot folder.
I finally select one or two pictures that I liked the most.

Photobucket
I upload it to Photobucket as I do with all my photos for storage.
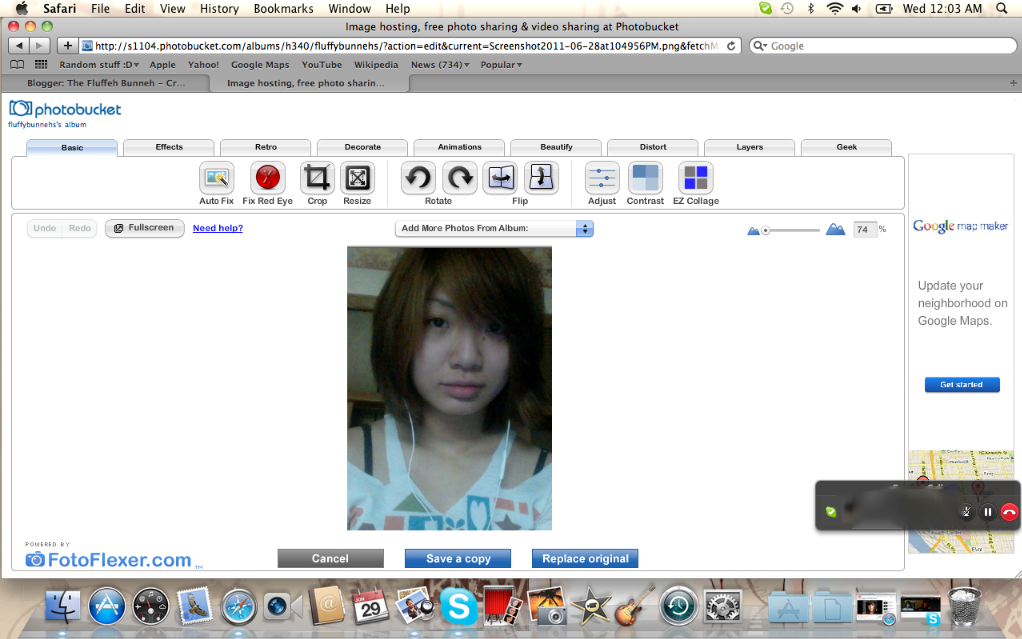
Once I do that, if the picture is unedited, I go to the Edit option in Photobucket.
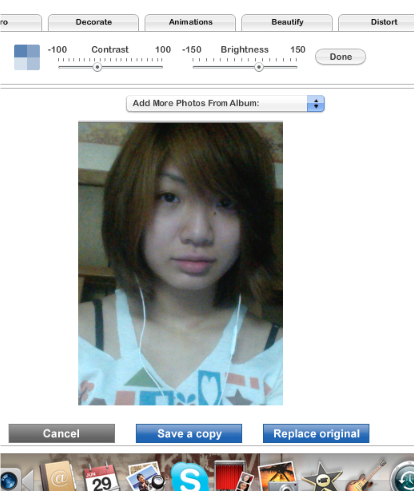
Editing screen on Photobucket
Original Photo:

Example 1:

When I got onto the Photobucket thing for editing, click on Contrast.
I changed the levels of the picture so contrast was lower and brightness was higher

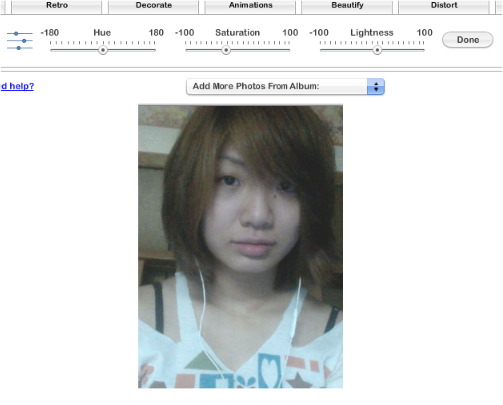
Moving to Adjust, all I really did was take make the picture more brighter and took the level of saturation down until I was happy with the colors.
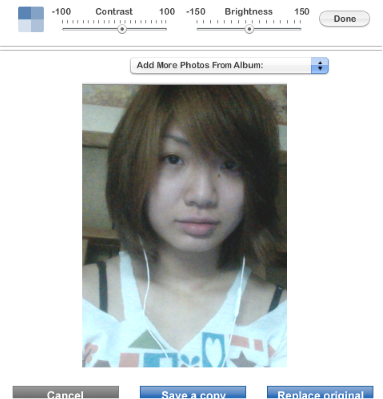
I went back to Contrast one more time and raised contrast slightly.
Done!

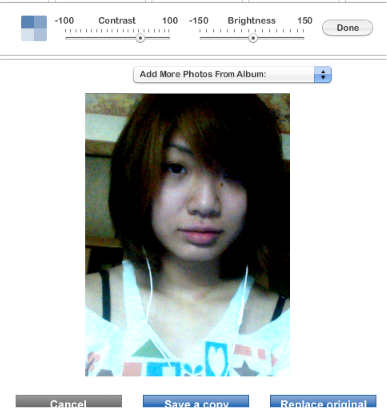
Example 2:

For this one all I did was go to Contrast and raise Contrast up a lot.
I swear I did brightness too... I guess not?

In Adjust I lowered saturation and messed around with it until I liked the balance of color and no color.
And then, done!

iPhoto
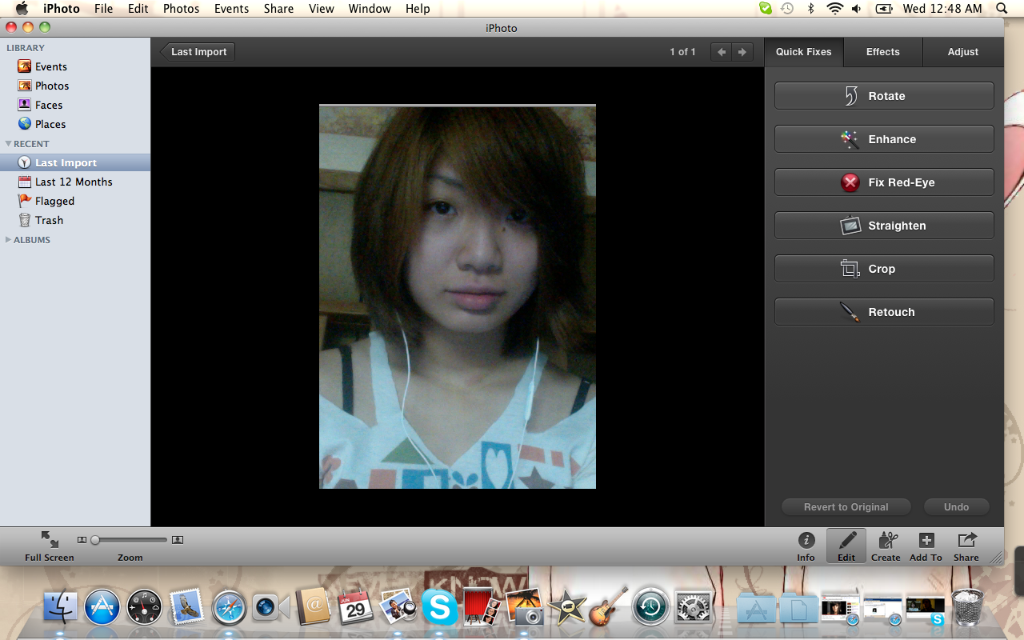
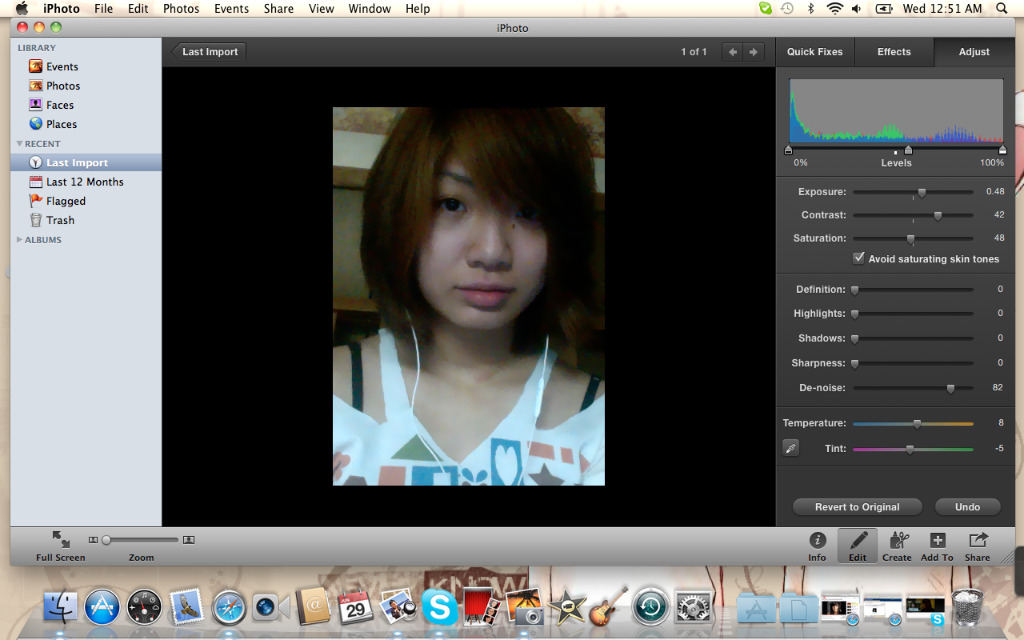
After I imported to iPhoto, I opened up Edit.
In Adjust, I just did all this and I was done with it all.
No need to go through a ton of tabs to get to what I want, it's pretty much all in one window.
Finished picture!


As you can see, with just a little change, I could change the picture completely.
For tips, on Photobucket, don't do anything else besides contrast, brightness, and saturation.
They have other tools/options like fixing wrinkles, all that good stuff.
But honestly, they suck.
I used to be a Photoshop junkie a while back but I got bored of hiding all my imperfections.
I mean, who's perfect?
I sure am not.

On my Phone:
What Bunneh mainly uses: PhotoWonder, Photobucket (for uploading)
Why: Excellent features, easy to use, fun to mess around with, nice tones, etc.

What I do is take lots, and lots of pictures with my phone.
After, I go through all the pictures (does this sound familiar?), I delete the ones I don't need.
With the pictures I need, I open up my PhotoWonder app.
From there, I just simply click Edit, find the picture I'm looking for, and upload.
That's when the magic starts.

If you haven't already and you have an Android phone, go get PhotoWonder.
It's free but it's totally worth the download.
Personally what I do on the app is mess around with cropping, contrast, brightness, and effects.
It's a great app for other camera w***** like me!
Seriously, you can even brighten skin, and all that other good beauty stuff.

My personal favorites for effects is Autumn and Blue Tone.
Here are the examples of what I mean by Autumn and Blue Tone:

Autumn:
Warm colors, fall like colors, washes colors out in an amber like color
Blue Tone:
More blue like tinge to pictures, darker, more sharp than a wash out effect


Well I hope that helped some people....
But yeah, this is how I edit my photos really :)
All I do is brighten, contrast, and one more effect really.

E-mail or comment if you have suggestions or questions!

-hugs and smiles-
Bunneh 

Tuesday, June 28, 2011

Mac: Bootcamp (Part 1)

CLICK HERE FOR THE FINISHED VERSION OF THE GUIDE, UPDATED, MORE INFO... MORE PROFESSIONAL... YEAH.

Written for a friend of mine!
Plus for anybody else suffering with their Macbook Pro's on how to get Bootcamp working to play games like PWI or anything else PC supported.
Or for people really who just want Windows on their Macs for some reason.
Yup.

Introduction

To explain briefly, I've been a Mac user for years and I absolutely love it.
Except for one thing:

YOU CAN'T PLAY ANY GAMES ON A MAC =__=
STUPID MAC!!!!
WHY NOT HAVE MORE MAC SUPPORTED GAMES FFS!!!!
*throws Macbook Pro out the window*
HA!!!!!!!

(Please do not throw anything out the window and I hold no responsibility over any damage done to any Mac related products or harm/injury caused by doing so)
....
Beyond that point, Apple is kind enough to let us play those games.
(If not, I doubt many PC users would convert to Macs)
They have their own program, Bootcamp, that is used to balance either operating systems of choice.
I definitely recommend Bootcamp over Parallel, Crossover, etc.
Many programs have their own variations of how to get Windows onto a Mac.
Or just have Windows games be playable directly on the current operating system of Mac.
But honestly, those lag, glitch up way too much, etc.
Not worth the price.

Did I mention Bootcamp comes free with your Mac?

Yup!
Awesome huh?
I personally used Bootcamp most for the game PWI (Perfect World International)
PWI is one of the perfect examples of why Bootcamp is existing.
It's completely PC supported, no Mac supported versions to download.
If you go to the Support section, there is definitely no help for Mac users.
Literally all you'll get is "Talk to other players"
Seriously.

I used Bootcamp from the 3 years I played it and its always worked.
However, I do warn this.
When you run games on Bootcamp, you might/will have overheating issues.
I personally always did and they always overheated the laptop to the point of dying months later.
Get a cooling mat, don't think it won't happen to you.
Do you want to lose that $1199 or more laptop?
I didn't think so.

So, here's a small guide on how to use Bootcamp.
It's only a Part 1 because I forgot to find my Windows Vista CD
(Don't blame me... it's 2:11AM...)
I hope this helps you, any questions feel free to comment, e-mail, or... whatever.
Just don't try to find out my number and text... now that's creepy haha.
No really, it is.

Bootcamp

What you'll need:
A Mac computer/laptop
Windows CD (e.g. Vista, 7, etc)
OS X Leopard Installation DVD
Patience
Time

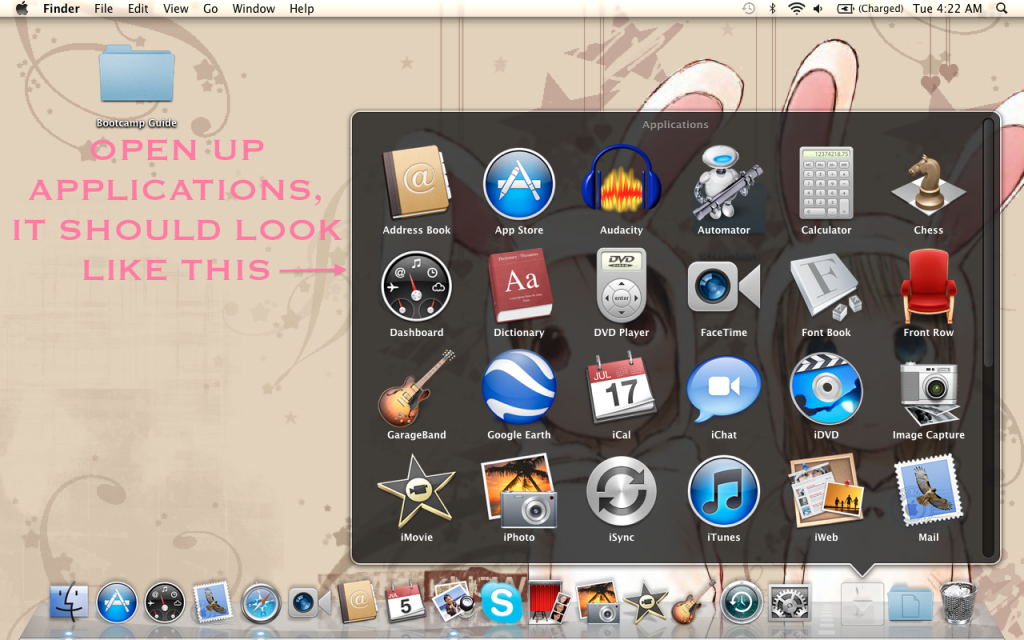
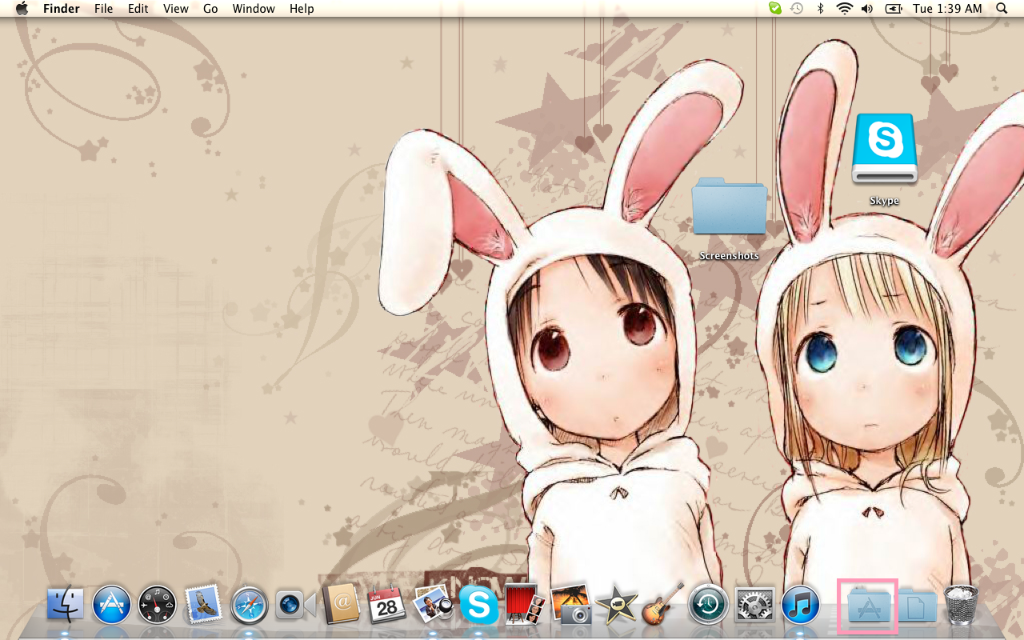
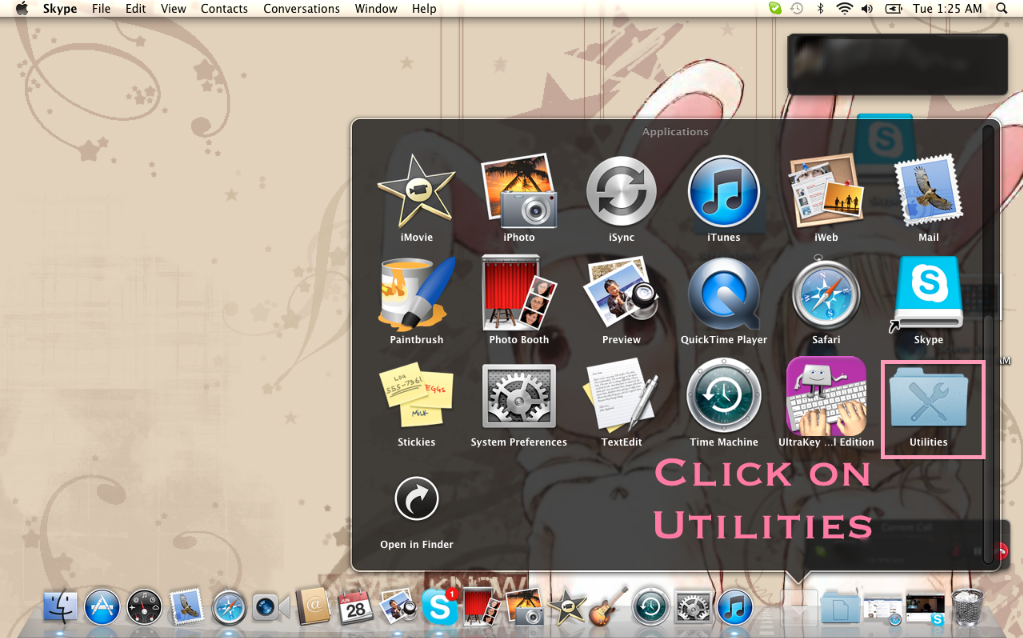
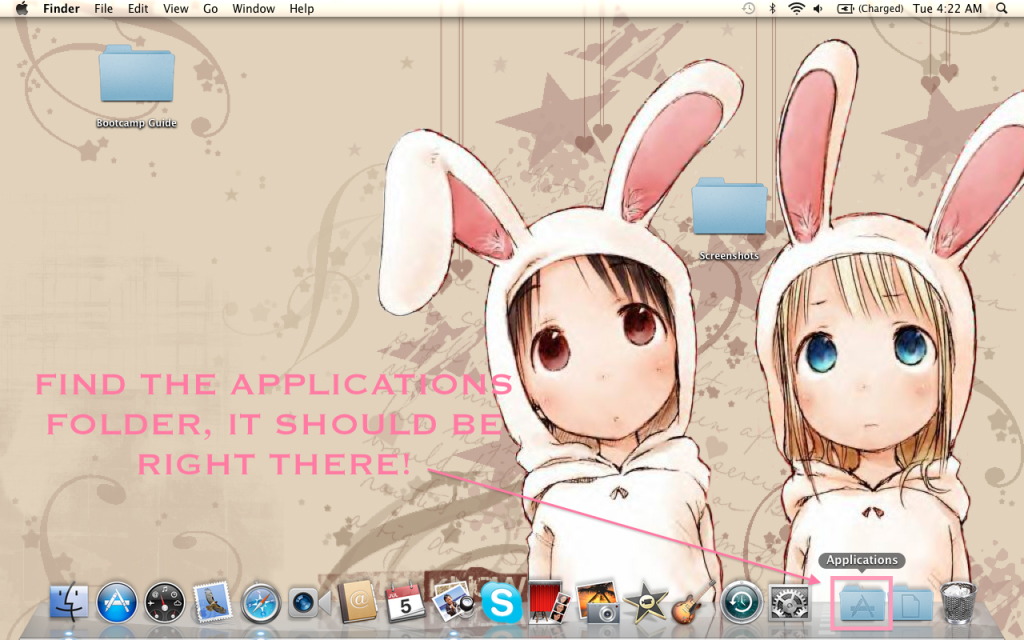
When your Mac is set up and ready to go, look for Applications.
Applications is in the pink rectangle in the dock. It's always in the same place next to Documents

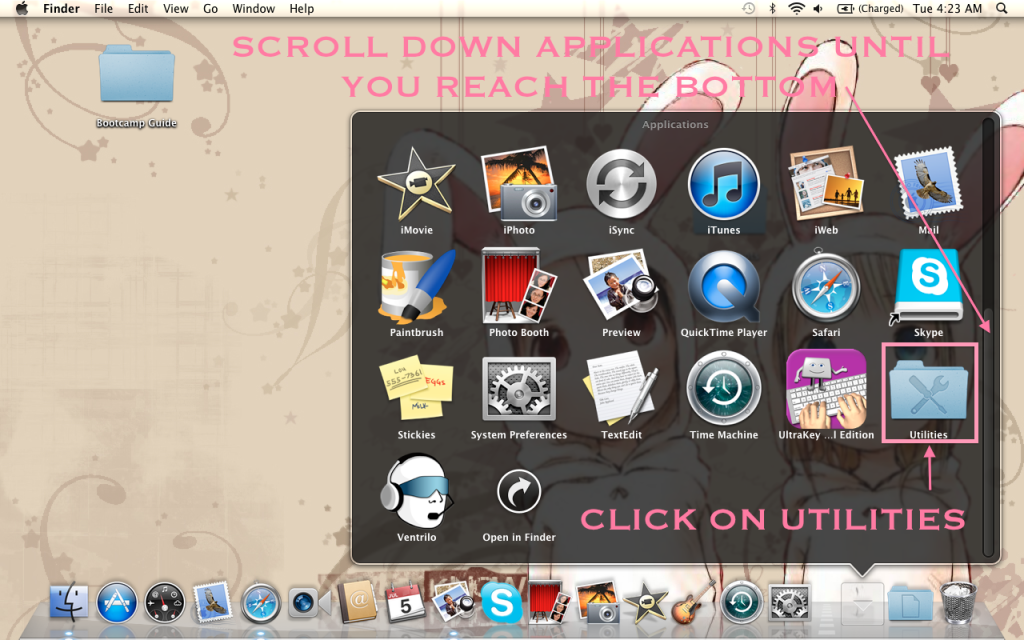
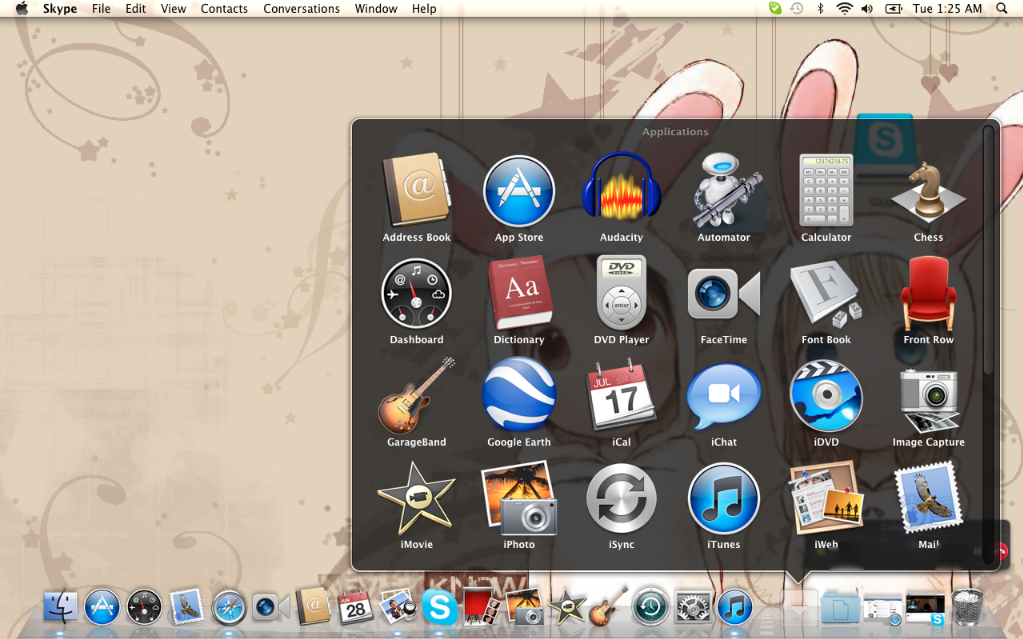
When you open up Applications, scroll down....... (next picture)
Applications
Click on the Utilities folder
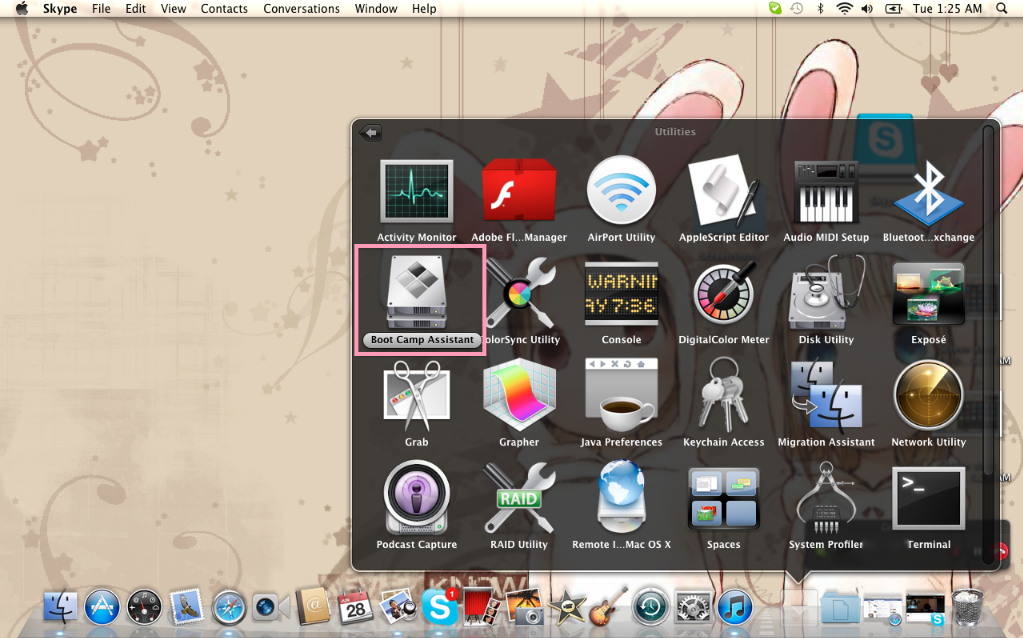
Applications scrolled down to the bottom
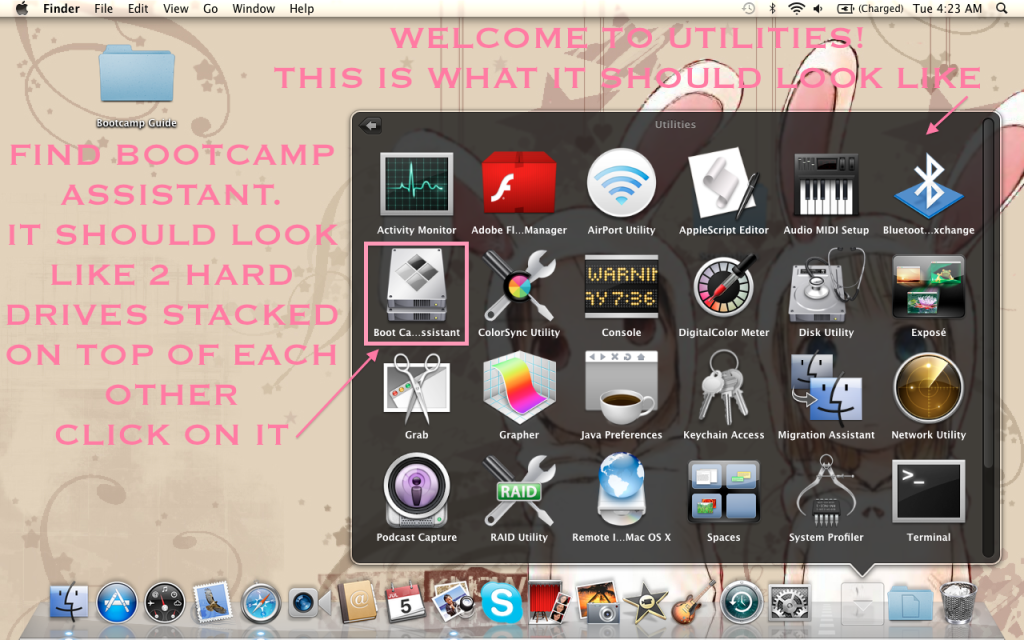
In Utilities, locate Bootcamp Assistant and open it
Shown in the pink rectangle
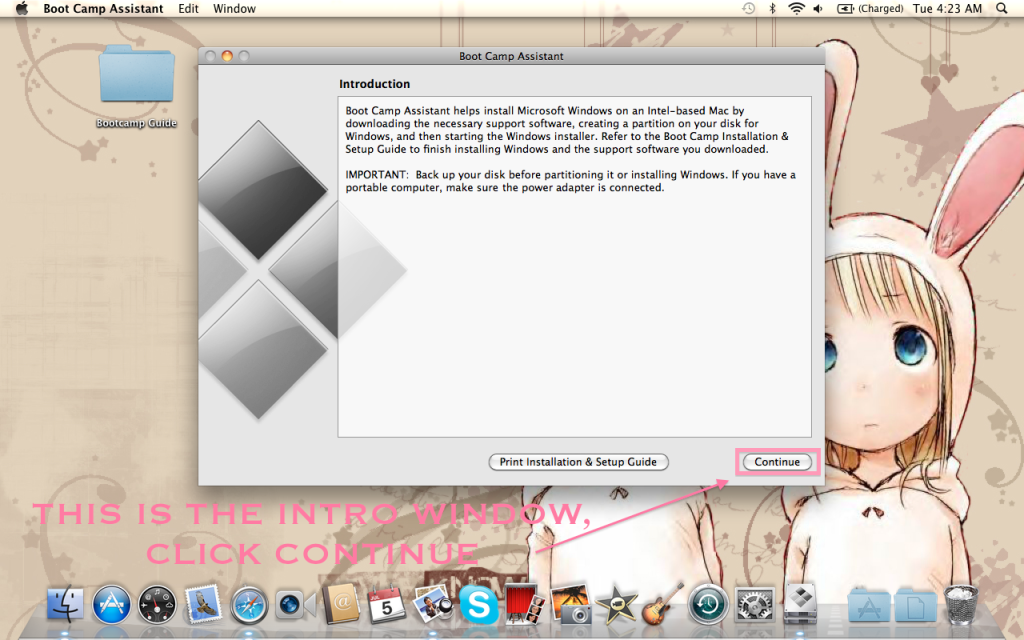
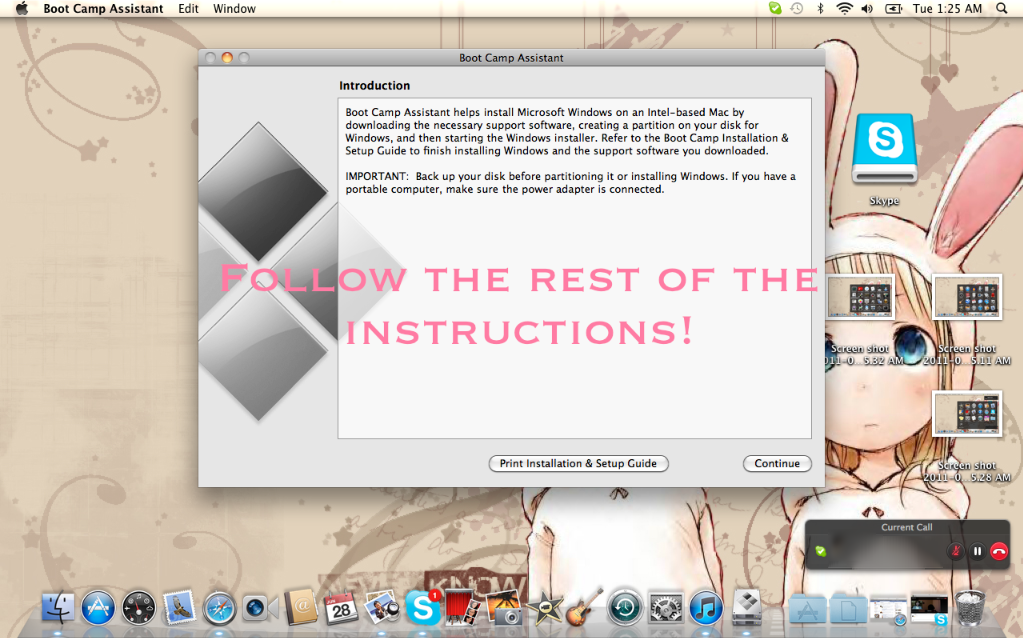
From here on out, just grab your Windows CD, and follow the instructions.
Bootcamp starter window
I know, that wasn't really much of a guide if at all.
But even a little bit I thought would be helpful to some people.
I'll add Part 2 once I grab my Windows CD sometime today or in the next few days.
Depending when I have time, of course.

Hope this helped!
As I said earlier, if you have any further questions on anything or about any of these, ask!

-hugs and smiles-
Bunneh